
A recipe from Signora Emilia, part of our Cucina della Nonna series.
Making your own pizza dough starts with flour, water, yeast, and salt. The crucial part happens afterward: the dough is given time, becomes supple, and can be shaped into a thin base with an airy rim. Here you’ll learn the basic dough with a long cold fermentation in the fridge. Afterward, we’ll turn it into a Pizza Margherita with tomatoes, mozzarella, basil, and good olive oil.
Our recipe is designed for a standard home oven. You do not need a wood-fired oven or a stand mixer. With four dough balls, a hot baking tray or pizza stone, and a little planning, it makes for a lovely pizza night. Prepare the dough the day before; the next day, it is mainly shaping, topping, and baking.
If you would like to make your own pizza dough, it is worth paying close attention to the consistency. The dough should be soft and elastic, not dry and firm like pasta dough. We therefore guide you through every step and also explain why too much tomato sauce or wet mozzarella can make a good base unnecessarily soft.
Table of contents
- Recipe and schedule at a glance
- Ingredients for pizza dough and Margherita
- Which flour is suitable?
- Make your own pizza dough: step by step
- Turn the dough into a Margherita
- Common mistakes and how to fix them
- Preparing and freezing
- Frequently asked questions
- The right organic olive oil
Make Your Own Pizza Dough: Recipe and Schedule
| Yield | 4 pizzas, about 28–30 cm in diameter |
| Dough quantity | about 1 kg; 4 dough balls of about 250 g each |
| Active prep | about 40 minutes for dough, sauce, and shaping |
| Resting times | 1 hour at room temperature + 18 hours in the fridge + 2 hours to come to temperature |
| Baking | about 8–12 minutes per pizza; about 40 minutes for four pizzas one after another |
| Total time | Example calculation: about 22 hours 20 minutes; slightly longer depending on dough temperature and oven |
| Oven | 250–275°C top/bottom heat; preheat tray, stone, or steel well |
| Difficulty | Medium; easy to manage by hand |
Estimated energy: about 550 kcal per dough portion without toppings; about 850 kcal per whole Margherita with one quarter of the toppings listed below. One portion in this recipe is one whole pizza, not a single slice.
Basis for the energy estimate
Calculated for four pizzas with a total of 600 g flour, 3 g fresh yeast, 400 g canned tomatoes, 400 g drained cow’s milk mozzarella, 20 g olive oil, and about 5 g basil. Based on USDA food data and a mozzarella with 238 kcal per 100 g. Water and salt provide no energy; additional dusting flour is not included. Values are estimates rounded to the nearest 10 kcal. They may vary depending on flour, cheese, oil quantity, and portion size.
How to fit the dough into your day: For example, mix and knead at 5 PM, let it start to rise for one hour, and refrigerate the dough balls around 6:30 PM. The next day, remove after about 18 hours and let them relax, covered, for about two hours. Preheat the oven during the last 45–60 minutes. The clock provides the framework; visibly risen, stretchable dough matters more than a rigid minute.
Make your own pizza dough: ingredients for 4 pizzas
For the Italian basic dough
| Pizza flour Tipo 00 or Tipo 0 | 600 g, plus a little for handling |
| Water, cool to room temperature | 390 g or ml |
| Fresh yeast | 3 g; alternatively about 1 g dry yeast |
| Fine salt | 12 g |
That is 65% water relative to the flour amount. Choose a flour suitable for pizza and longer fermentation. For the small amount of yeast, a precision scale is helpful. Do not use fresh yeast and dry yeast together. Sugar, eggs, and milk do not belong in this basic dough; we also do not need oil in the dough here.
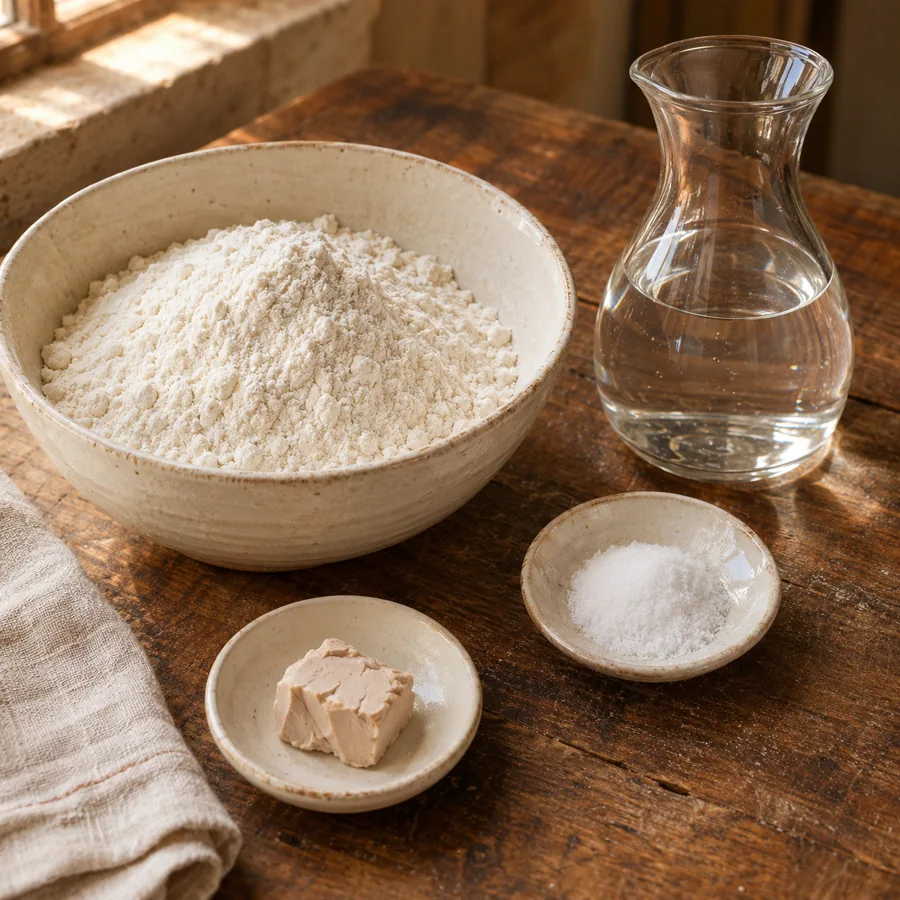
Few ingredients, time for the dough
When making your own pizza dough, the ratio of ingredients matters. Weigh especially the water and salt instead of estimating by eye. This makes the consistency reproducible.
The ingredient photo shows the components, not a to-scale quantity guide. The gram amounts in the table are what matters.
Additionally, for four Pizza Margherita
| Peeled canned tomatoes | 400 g; if there is a lot of thin juice, drain a little |
| Cow’s milk mozzarella / fior di latte | 400 g drained weight |
| Extra virgin olive oil | 20 g total, about 5 g per pizza |
| Fresh basil | about 5 g or a few leaves per pizza |
| Fine salt for the tomatoes | to taste; start with about 2 g |
You will also need a bowl, a dough scraper, four lidded containers, and a sturdy baking tray or a pizza stone/steel. A pizza peel helps for sliding it into the oven. A flipped, well-preheated baking tray also works as a starting point.
Which flour should you use to make pizza dough?
An Italian pizza flour Tipo 00 or Tipo 0 is a good starting point. However, the type number alone does not describe baking strength. Look for a recommendation for longer fermentation; a protein content around 11–13% is often helpful. Not every very finely milled 00 flour is equally suitable for a long fermentation.
As an easy-to-find alternative, you can try a strong bread flour (Type 550). It is not an exact equivalent to Tipo 00. With an unfamiliar flour, hold back 15–20 g of the water at first and add it during kneading as needed. The energy estimate refers to the full recipe quantity.
Our basic dough follows the Italian combination of flour, water, yeast, and salt. For the home kitchen, we use our own fridge fermentation method. If you would like to learn the traditional guidelines in more detail, you can find them from the Associazione Verace Pizza Napoletana. The baking method described here is intended for your home oven.
Make your own pizza dough: instructions
Step 1: Weigh the ingredients and mix the dough
Dissolve 3 g fresh yeast in 390 g water. Put 600 g flour in a large bowl, add the yeast water, and mix everything until no dry pockets of flour remain. Leave the rough dough to rest, covered, for ten minutes.
Then sprinkle 12 g salt over it and work it in thoroughly. At this point, the dough may still be uneven and slightly sticky. Do not add extra flour right away; the consistency changes with resting and kneading.
Step 2: Knead the pizza dough until smooth
Knead the dough by hand for about 10–12 minutes. Push it forward with the heel of your hand, fold it back, and turn it slightly. Very little flour is needed on the work surface; a dough scraper helps prevent sticking.
The finished dough should be soft, cohesive, and elastic. If it becomes resistant while kneading, let it relax, covered, for five minutes, then continue. With a mixer, a shorter kneading time on a low setting is usually enough; prevent the dough from heating up too much.
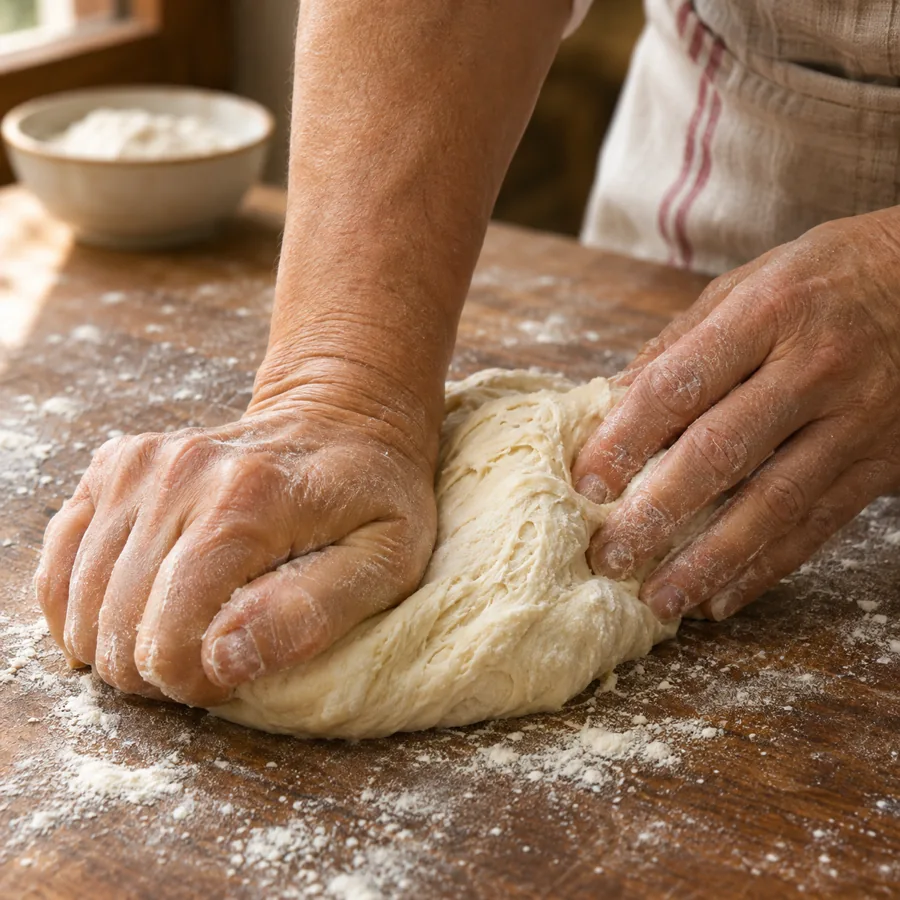
How to recognise the right consistency
At first, the dough sticks slightly to your fingers. That is normal. A dry, firm ball forms quickly, but it often stretches less well later.
When learning to make your own pizza dough, a dough scraper helps more than adding a large extra handful of flour. Short breaks give the flour time to absorb the water.
Step 3: Let it start to rise for one hour
Place the dough in a sufficiently large bowl and seal it tightly. Leave it for about one hour at around 20–22°C. The surface should remain protected; a drying kitchen towel alone is often not enough.
In this phase, the volume does not need to double yet. The dough should relax a little and fermentation should begin. In a very warm kitchen, this phase is shorter; in a cool environment, it can take longer.
Step 4: Shape four dough balls and let them cold-ferment
Use a dough scraper to divide the dough into four pieces of about 250 g each. Gently pull the edges of each piece down towards the centre and shape a ball with a smooth surface. Do not compress the dough unnecessarily.
Place the balls seam-side down in lightly floured, tightly closing containers with room to rise. Refrigerate for about 18 hours at around 4°C. The long, cool fermentation is part of this recipe’s schedule.
Step 5: Bring the dough to temperature and preheat the oven
Take the dough balls out of the fridge about two hours before baking and leave them, covered, at normal room temperature. They should visibly relax and be easy to stretch. Very cold dough often tightens up when shaping.
During the last 45–60 minutes, preheat the oven with a pizza stone, baking steel, or a suitable flipped tray to 250–275°C top/bottom heat. Observe the temperature rating of your equipment. With a baking tray, the lower to middle rack is a good starting point; adjust the height to match how your oven browns.
Step 6: Shape the pizza base by hand
Place one dough ball on a lightly floured work surface. Gently press with your fingertips from the centre outwards, leaving about 1–2 cm around the edge largely untouched. Keep turning the dough and stretch it carefully to about 28–30 cm.
Do not use a rolling pin for this airy rim. If the dough springs back, cover it again for 10–15 minutes instead of pulling harder. The centre should become thin, but not develop holes. Shape and top the pizzas one at a time; keep the remaining dough balls covered.
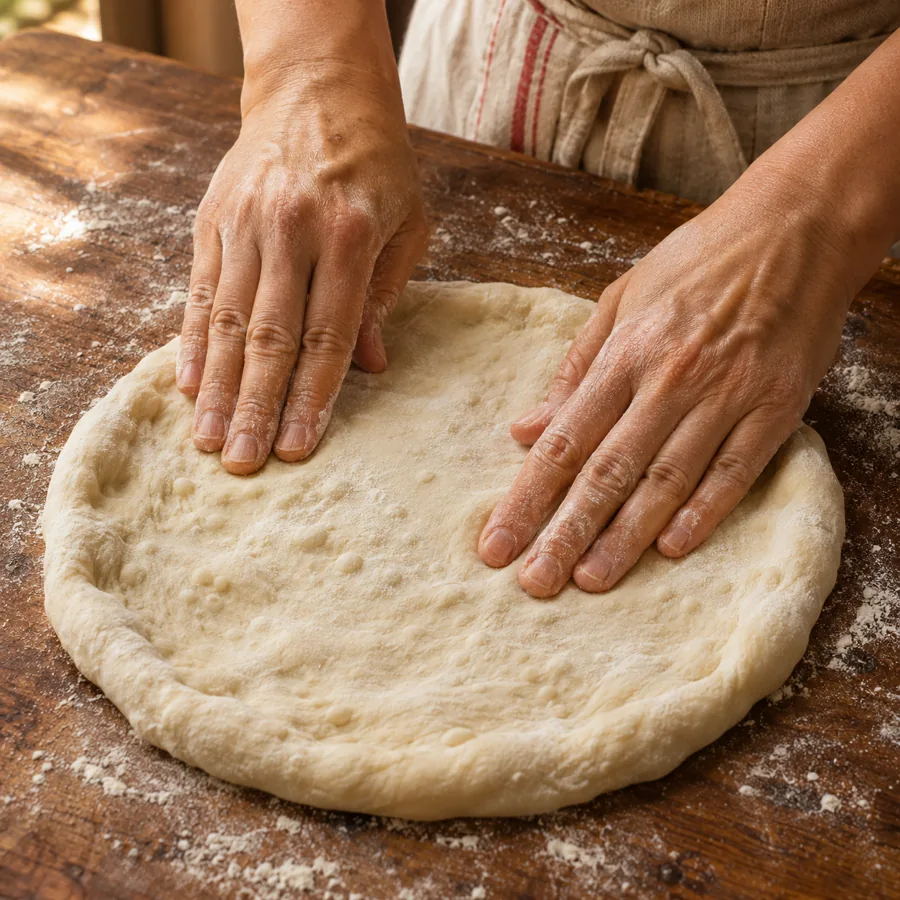
Keep air in the rim
When making your own pizza dough, shaping is a step in its own right. If you press the rim flat, you will get less volume later.
A little irregularity is perfectly fine. An evenly thin centre and an intact rim matter more than a perfect circle.
Turn the pizza dough into a Pizza Margherita
Now the basic dough is ready for your toppings. With a Margherita, the tomatoes, mozzarella, and basil should remain recognisable. It is better to distribute a modest amount evenly than to pile the base high. The following two steps are part of the complete recipe.
Step 7: Prepare the tomatoes and top the Margherita
Crush 400 g peeled canned tomatoes by hand or with a fork and season with a little salt. Start with about 2 g salt for the entire sauce. If the juice is very watery, you can pour off some of it beforehand. Cut 400 g drained mozzarella into strips or pieces and let it drain in a sieve in the fridge for at least 30–60 minutes; pat dry if needed. You can prepare this during the final dough rest.
Place the shaped base on a lightly floured peel. Spread about one quarter of the tomatoes over it and leave the rim free. Add about 100 g mozzarella on top. Top it only shortly before sliding it into the oven so the base does not stick to the peel. With longer baking times in a 250°C oven, you can add the mozzarella only after the first 4–5 minutes so it stays juicy.
Step 8: Bake hot and finish with basil and olive oil
Slide the pizza onto the hot baking surface. Bake for about 8–12 minutes, depending on your oven and surface, until the base is baked through, the rim is browned, and the cheese has melted. If browning is uneven, rotate it carefully. At 250°C or with a less powerful oven, it may take a little longer. Check the base rather than looking only at the cheese.
Take the pizza out and add fresh basil and about 5 g extra virgin olive oil on top. That is roughly a small teaspoon; for the nutrition calculation, the gram amount is what counts. Bake the remaining pizzas the same way and serve immediately. For four pizzas one after another, we plan around 40 minutes of baking time.
Sugo, mozzarella, and olive oil: what matters
The tomatoes: For this Margherita, a simple, uncooked tomato sauce is sufficient. A long-simmered pasta sauce is not necessary. Very thin tomatoes add water to the base; thick tomato paste on its own quickly becomes too concentrated. Season the tomatoes before they go on the pizza.
The mozzarella: Cow’s milk mozzarella (fior di latte) works well. Buffalo mozzarella is also possible, but it often contains more liquid. Pay attention to the drained weight and drain it thoroughly. In a home oven, adding the cheese later can help protect it from drying out.
Basil and oil: Fresh leaves added after baking keep their aroma and do not burn. A small drizzle of good olive oil rounds off the Margherita. You can find more on choosing it in our tips on how to recognise good olive oil.
Make your own pizza dough: avoid common mistakes
| The dough is very sticky | Work with a dough scraper, take short rests, and add flour sparingly. Next time, take the flour’s water absorption into account. |
| The base shrinks back | Let the dough relax longer, covered; do not forcefully stretch cold dough balls. |
| The dough tears | Do not stretch too thin. Carefully seal a small hole by overlapping a bit of dough. |
| The pizza turns soft underneath | Preheat the baking surface longer, use less or thicker tomato sauce, and drain the mozzarella more thoroughly. |
| The cheese dries out | With longer baking times, add the mozzarella later and do not bake the pizza longer than necessary. |
| The pizza sticks to the peel | Top it only immediately before baking, lightly flour the underside, and do a gentle shake test before sliding it into the oven. |
Baking paper is not automatically suitable at very high temperatures. Use it only within the temperature limit stated on the packaging. With a little practice, you can slide the pizza directly from the floured peel onto the hot surface.
Prepare and freeze pizza dough
Making your own pizza dough is easy to plan for the day before. For your first attempt, stick to the 18-hour fridge fermentation. A significantly longer or warmer fermentation changes the result; more time is not automatically better. If the dough smells clearly unpleasant or shows unusual discolouration, do not use it.
To freeze, shape the four balls after the first hour of resting and pack them individually airtight with a little room. Freeze them promptly. Later, thaw them overnight in the fridge, covered, and let them relax for about two hours at room temperature before shaping. The thawing phase replaces this recipe’s fixed fridge schedule; also assess how much the dough has relaxed. For best quality, use within one to two months if possible.
If you would like to make pizza dough for several people, you can increase the ingredients proportionally. The maturation times do not automatically become twice as long. Instead, pay attention to container size, fridge temperature, and how quickly your oven bakes each pizza.
Frequently asked questions about making pizza dough
Which flour is good for making pizza dough?
Use a wheat flour Tipo 00 or Tipo 0 suitable for pizza and longer fermentation. The type number alone says little about baking strength. A strong bread flour (Type 550) is a possible alternative; depending on the flour, you may need to adjust the water slightly.
How long does this pizza dough need to rise?
Plan for one hour at about 20–22°C, then 18 hours in the fridge at around 4°C, and then about two hours, covered, at room temperature. What matters is that the dough balls have relaxed and stretch well. Very cold or warm dough may need a different amount of time.
How much yeast do you need for 600 g flour?
For the fridge fermentation described here, we use 3 g fresh yeast or about 1 g dry yeast for 600 g flour. The yeast amount is matched to this time and temperature schedule. For a quick same-day dough, you need a different method.
Does Italian pizza dough need olive oil?
In this basic dough, we use only flour, water, yeast, and salt. Olive oil is not necessary for it. For other Italian dough variations, oil can make sense. Here, we add a small amount to the finished baked Margherita.
Can I make pizza dough without a stand mixer?
Yes. Mix the ingredients in a bowl and knead the dough by hand for about 10–12 minutes. A dough scraper and short covered rests help with sticky dough. Use extra flour sparingly.
Why does my pizza dough keep shrinking back?
Often the dough is still too cold or not relaxed enough. Let it rest for another 10–15 minutes, covered, then continue shaping gently. Pulling hard or using a rolling pin does not solve the cause and can compromise the airy rim you want.
Do you need to cook the sugo for Pizza Margherita beforehand?
Not for this recipe. Crush peeled canned tomatoes and season with a little salt. If needed, remove some of the very thin juice and spread the sauce sparingly on the base. A heavily seasoned or long-simmered pasta sauce is not required.
Which cheese is suitable for Pizza Margherita?
Cow’s milk mozzarella (fior di latte) works well. Slice it in advance and let it drain thoroughly in the fridge. Buffalo mozzarella is also possible, but it may release more water. With longer baking times in a home oven, it helps to add the cheese only after a few minutes.
How long does pizza bake in a normal oven?
On a well-preheated baking surface at 250–275°C top/bottom heat, allow about 8–12 minutes per pizza. Depending on the oven, surface, and toppings, it may take longer. The base must be baked through; melted cheese alone is not a reliable indicator of doneness.
Can I freeze homemade pizza dough?
Yes. After the first hour of resting, divide the dough into balls and freeze them individually, packed airtight. Thaw overnight in the fridge, covered, and let them relax for about two hours at room temperature before shaping. Also check that they have relaxed enough and stretch well.
The right organic olive oil for your Pizza Margherita
Premium organic extra virgin olive oil 2026
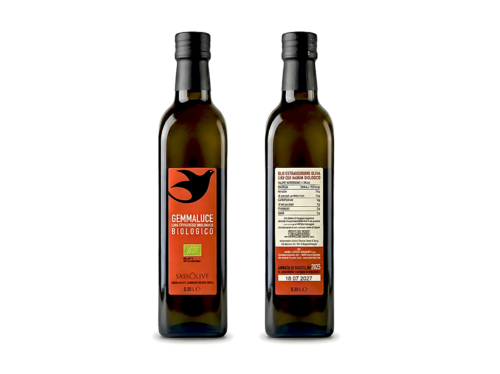
For the few drops after baking, an aromatic organic extra virgin olive oil is well worth it. Our currently available oil from Liguria complements tomatoes, basil, and mozzarella and also goes well with a piece of freshly baked pizza crust.
When making your own pizza dough, we leave the oil out of the basic dough. On the finished Margherita, it provides a lovely aromatic finish. Discover Organic Farming Italy’s organic olive oil directly in the shop.
More Italian recipes from our kitchen
If you enjoy making your own pizza dough, try our Focaccia Genovese next. For your next pasta night, you will find homemade tagliatelle and Italian gnocchi here as well. All posts are listed in our overview Recipes and knowledge about Italian cuisine.
How did your pizza turn out? Write to us in the comments which flour and which baking surface you used. These details help others when baking it themselves. Buon appetito!